Chicago!

Well, technically, St. Charles. I’m at the Pheasant Run resort, teaching classes for the Sewing & Quilt Expo. I’m supposed to be printing out my class packets, but instead I’m dicking around on the internet.

If you want to take my Stash Shawl class (6:00 tonight) or my Hat Menagerie (gnome, bear, pony, kitty, lambykin, devil, etc.) class (6:00 Friday night), get yer ass down here. You can register here at the Mega Center (which is not an awesome bargain salvage outlet, as I hoped when I saw the sign, but a small expo center) at the Pheasant Run Resort. I think they’re about $60 for a 3-hr class & there’s plenty of room. Afterwards, Shannon & I will probably be having drinkies and knitting under the influence in the hotel bar. Shannon will be unwinding after a busy day, and I’ll be mourning my depressing unpopularity and poor choices in packing.

Last night at the Target next door, I responsibly put back the brown boots I was going to buy to make up a cuter outfit than what I had packed, but I think tonight I’ll be creeping back after class to get the boots in hopes of bolstering my faltering self-esteem. I keep telling myself there’s alluring classes actually in Chicago this weekend and it’s Stitches East, so I shouldn’t feel bad, but still.

I took the train up here yesterday. On the way up, roomettes were cheap, so I holed up in my adorable little private-closet-con-bunk and listened to the 10 records on my iPod and knitted stuff I later frogged, twice. It was fun, and actually went by too quickly for my liking. On the way home, the roomettes were expensive, so I’ll be in coach longing for the good life in the sleeper car. And the train gets in so late & stupid Topeka rolls up the sidewalks on Sunday, so I had to bail on the class I was so excited to take next week, because there’s no way for me to rent a car in time to actually drive to my class before it’s well underway.

I’m also hoping for some more good Mexican food  for dinner tonight (last night, I had some excellent tacos al pastor). Afterwards, I was so tired, I dropped like a log before I even had a change to imbibe in the chocolate and build-your-own-beer packs we’d assembled at the Target liquor store. (They have liquor stores in Target here! Now if they add a yarn store, all  my retail dreams will finally come true!)

Okay, I’m going to get to work printing out my glorious handouts. I’m starting out a new stash shawl for my stash shawl class, but I’m afraid I might be raiding some yarn I was tentatively planning on using in another Faux Fair Isle sweater. But it’s not like I can’t order some more Beaverslide. And I wanna new shawl!

Yarn School!

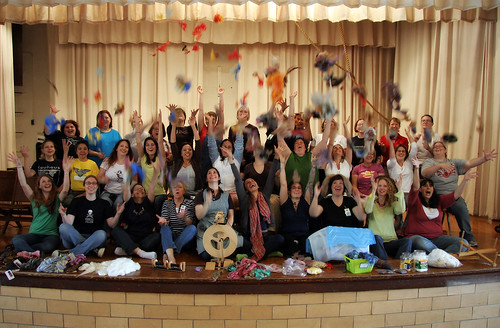
(I’m using John Wise’s picture, because it’s so nice! He came with Caroline Wise and was the unofficial Yarn School historian.)

Yarn school was awesome! Our two helpers, Amber and Melissa, were amazing workhorses and completely saved my life. Blake’s food was scrumptious; Adrian, Sarah & Jennifer were excellent teachers; and all of the students were just delightful. Not a sourpuss in the bunch! Even though I was running around a lot, I still learned a ton. For instance:

  • The difference between double drives and single drives and how various types of wheels work (everything but Louets were previously a mystery to me)
  • Some basics of color theory
  • That I’m a rank amateur with color. I have decent instincts, but I’m incapable of doing anything really bold. I think I’m going to do some book learning. Adrian and Sarah continue to blow my mind.
  • How to spin from the fold
  • Tips on spinning fine and silky fibers
  • How to card and spin cotton
  • Why my made-up guesstimate of plying SUCKS and how to actually ply (need to practice more before I forget)
  • NAVAJO PLY, motherhumper! And while I’m not amazing, I now get the basics, and how to keep from getting my arm stuck in the yarn while I ply! All the joints still have a weird loose area right before, which I wasn’t able to shake. Most of them evened out when I washed the yarn, but a few are still loose and sloppy, as seen here. Any tips on improving this? (I think it will disappear in the knitting, so my main objective, self-striping handspun, has already been met, but my technique wants practice.)

  • How to make a CD spindle (This wasn’t part of Yarn School, but I made several ahead so we’d have plenty. And they work!)
  • How to spin worsted. My natural method was sort of a bastardized woolen.
  • That I totally want a Woolee Winder
  • How to harvest angora bunny wool
  • How to comb wool
  • That alpacas like to be patted from underneath

And after a year of not touching a spindle, I’m now magically able to really drop spindle, not just park and draft.

Plus, now I have an army of drum carders (and I’m a Strauch dealer, if you’re interested…) and a gym floor full of odds and ends to card into fabulous garbage batts! Yay! I already used the dye lab dregs–mixed leftovers and residue from containers I was rinsing–to dye a ton of fiber.

What else? Piles of feedback to make next year even more fun & smooth (this year was worlds better than last year). A new local spinning friend–Laura from Laura’s Pygoras, whose goaties came out for a visit. And now I have local sources for angora, mohair, llama, shetlands, pygora, and alpaca!

Next weekend, I’m teaching & signing books at the Sewing & Quilt Expo in Chicago, then taking a spinning course. (Sadly, not nearly the bargain of Yarn School; and now that Ron’s working in Topeka, I have to rent a car. On the upside, I’ll get to visit with Suzanne), then it’s Ron’s birthday, then I’m teaching and signing books at the KC Sewing & Quilt Expo, and then, it’s. . . Felt School! Yay!

We need lots of wet space, so we’re limiting enrollment to about a dozen, so Felt School is going to be small and intimate. We still have a few spots left & it’s a bargain ($300, meals by chef Blake Brokaw, room & supplies included), so register now!

Fragged. I mean, frogged.

Not the whole thing, but I did have to frog the sleeve of Ron’s sweater to make it the right diameter. He seems to hav freakishly broad  chest & shoulders for his size, so making the torso right does not make the sleeves right. I have a creeping feeling they were way too big–I mean, I think I was using 24″ needles, and I always use 16s for sleeves. He got home today, and they’re way too big, so I had to frog back up to the pits and place decrease every row, following the raglan seam fairly well, and mostly (I hope) hidden in the armpit. I won’t be able to tell for sure until I’ve produced a few inches. I’ve also got to frog and reknit the hemline. I was trying for–oh, I don’t know what I was trying for, but I made the ribbing too loose (my Norwegian purl makes everything looser, too) and I’m going to need to ditch it and reknit it smaller.

But all that will have to wait, because it’s almost time for YARN SCHOOL! Yee haw! I’m super excited about getting to attend. I’ve still got a million things to do. I should probably go to sleep. Right this minute.

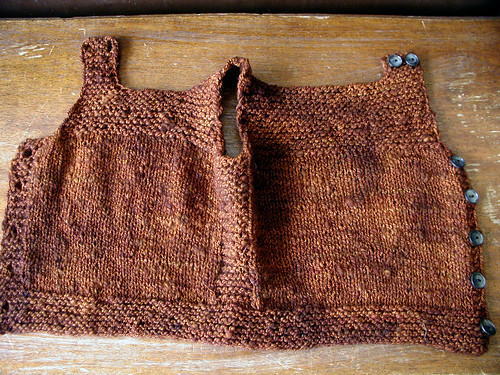
FREE PATTERN: Pebble (Henry’s Cobblestone-inspired Manly Baby Vest)

CHARITY KNITTERS: You may use this pattern freely for charity fundraising as long as you attach a tag/card with the name of the pattern and credit Nikol Lohr and ThriftyKnitter.com.

Obrigado to Claudia for the Portuguese translation!

Merci to Veronique for the French translation!

I loved the garter yoke and hem in brooklyntweed’s beautiful Cobblestone sweater, so I decided to pay homage to it in this little easy-on baby vest. I think it’s very manly. And shouldn’t all babies be manly?

One side and one shoulder are open and button up so you can put the vest on without going over the baby’s head. You’ll start at the bottom edge, work several rows in garter, then proceed up the body, working in buttonholes on the wider edge piece

Finished size: 9″ wide, 10″ tall at shoulder

Gauge: 19st, 27 rows=4″

Yarn: DK weight yarn of your choice, preferrably something tweedy or irregular, and in subdued tones (to keep it manly), about 100g. I’d recommend superwash unless the mom’s a knitter.

I chose my own thick and thin handspun 2ply superwash, because it obscures my baggy Norwegian purl rows, and overdyed it afterwards because the color of the knitted fabric was too much like Barbie skin.

Needles: US4

BODY

Buttonholes: All buttonholes are worked at the beginning of WS rows. To make a buttonhole, substitute Sl 1, K2tog, YO for the first 3 st of the buttonhole row.

CO 80 (I used the twisted German cast-on, because it’s my fav.)

Rows 1 – 12: Sl 1, K to end. (Reminder: Place buttonhole on Row 7)

Row 13 (WS): Sl 1, K4, PM, P 33, PM, K 6, PM, p 33, PM, K3

Row 14 (RS) & all even: Sl 1, K to end

Row 15 & all odd (except buttonhole rows): Sl 1, K4, P 33, K 6, P 33, K3

Reminder: Place a buttonhole at beginning of row 17, 27, 37, & 47.

Continue until 49 rows have been completed.

Row 50: BO all st before the first marker, K to 2nd marker, BO st between 2nd and 3rd markers, K to last marker, BO last 5 st. You’ll have 33 st each for front and back.

With WS facing, rejoin yarn on the half of the vest nearest the buttoholes. This will be your front.

FRONT

Row 1 & 3 (WS) : Sl 1, K to end

Row 2 & 4 (RS): Sl 1, SSK, k to 3 st from end, K2tog, K1

Rows 5-15: Repeat Row 1 (ending with a WS row)

Front Neckline

Sl 1, K 7, BO neck st until 7 st remain on your left needle, K to end. You should have 8 st on either side of neck.

Open shoulder

Row 1 (WS): Sl 1, K to end

Row 2 (RS) : Sl 1, ssk, K to end

Repeat Row 1 ten more times

Buttonhole row: K2tog, YO, K to 2 st from end, YO, K2tog

Work Row 1 twice more, then BO.

Seamed shoulder

With WS facing, join yarn at other shoulder.

Row 1 (WS): Sl 1, K to end

Row 2 (RS): Sl 1, k to 3 st from end, k2tog, K1

Work Row 1 eight more times, then break yarn and transfer live stitches to safety pin, locking stitch marker, or waste yarn.

BACK

With WS facing, join yarn.

Row 1 (WS) : Sl 1, K to end

Row 2 (RS): Sl 1, SSK, k to 3 st from end, K2tog, K1

Rows 3-23: Repeat Row 1 (ending with a WS row)

Back Neckline

Sl 1, K 7, BO neck st until 7 st remain on your left needle (plus one live st beyond the BO on your right needle), K to end. You should have 8 st on either side of neck.

Seamed shoulder

Row 1 (WS): Sl 1, K to end

Row 2 (RS) : Sl 1, ssk, K to end

Work Row 1 four more times, then break yarn, leaving 12″ tail.

Transfer reserved shoulder stitches to other needle. With RSs together (WSs facing out), seam shoulder with kitchener stitch, using tail from first s houlder

Open shoulder

With WS facing, join yarn at other shoulder.

Row 1 (WS): Sl 1, K to end

Row 2 (RS): Sl 1, k to 3 st from end, k2tog, K1

Work Row 1 six more times. BO.

Finishing

Weave in ends.

Sew buttons on non-buttonhole side and shoulder.

Block.

Curse, schmurse (or, my first boyfriend sweater)

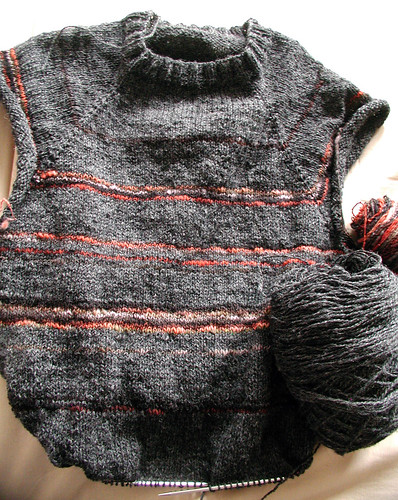
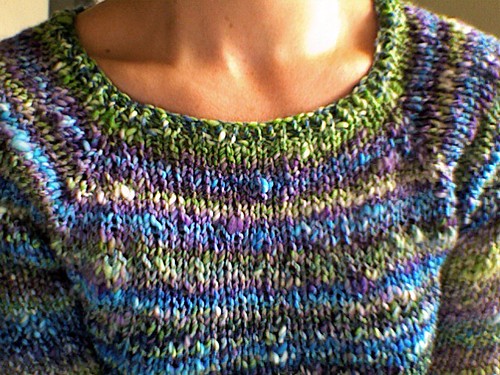
Top-down raglan knit to size of some of that sturdy 2-ply from Latvia, plus random stripes of my handspun single. Bigger than it looks–that dwindling gray was originally over half a pound of yarn. Need about 6 more inches of length, then some loose ribbing for the hemline. Then I’ll do the sleeves, which will be random and different from each other, and extra long for Cap’n Monkeyarms.

I always thought I had really stumpy arms, but I finally measured them and they’re exactly my height, just as they’re supposed to be, so there! All you jerks with those long arms that can reach things up on the high shelves, screw off! I’m perfect!

Also finishing up some Baby Henry stuff lickety-split, because Kelly Sue went and popped that little bun out of her oven two weeks early. The nerve! Happily, that makes him a Virgo, just like yours truly. And I have to say, he’s a very handsome baby. Not creepy or misshapen or sinister or dangerously boiled-looking. Nothing at all like his parents, in fact.

FREE PATTERN: Spring Forward Fall Back Raglan

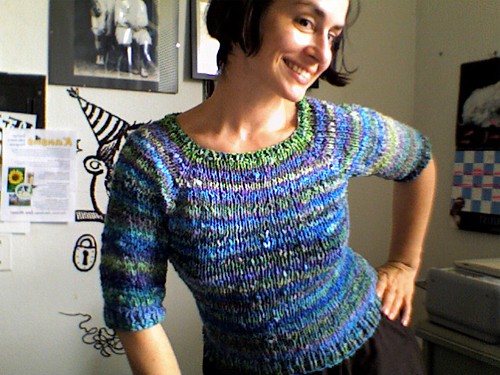
Here’s a quick, snug and stretchy sweater for cool autumn or spring weather. This is more for my own records than a real pattern, but use the instruction if you wish.

SIZE: Medium (but adjustable)

YARN: 8 oz thick & think handspun 2-ply

GAUGE: 14 st = 4″

NEEDLES: US 9 & 10 16″ and 24″ needles.

With US9 16″ needles, CO 68 st. Join in round.

Switch to US10 16″ needles, and work 3-4 rows in K1P1 rib.

K 21, PM, K13, PM, K21, PM, K 13.

Inc. every other row by knitting into the front and back of each st before and after each marker, until it’s a good snug fit to the armpits. Just transfer the stitches to yarn or a really long circular and pop it over your head, stretching it down comfortably toward your pits.

For me (M), this was 15 increases. Switch to 24″ US10 needles when needed.

K to first marker, drop markers and xfer sleeve stitches to holder, CO 3 st and k to next maker, drop markers and xfer sleeve stitches to holder.

Next round, pm before and after center armpit CO stitches.

Knit in the round about 2 or 3″

Decrease with k2tog/ssk around center armpit stitches every 4th row 3 or 4 times (4 stitches decreased per decrease row).

Work 4 – 6 rows plain, then increase around center stiches every 4th row 3 or 4 times (4 increase per increase row).

Switch to US9 24″ needles. Work 6 rows in K1P1 rib. BO in pattern.

Join yarn at armpit and with US10 16″ needles, PU 2 st along CO edge, PM, PU another 2 st along CO edge. With the other end of the yarn, do the same on the other sleeve. Alternate between rounds on each sleeve, so if you’re running short on yarn, you can stop early, rib and BO & they’ll be the same length.

Knit in the round. On the 8th rnd, decrease with matching k2tog/ssk on either side of markers. Repeat decrease again on next 7th, 6th, 5th, 4th, and 4th rnds.

Switch to US9 16″ needles and work in P1K1 rib around sleeve, k2tog on the last 2 st (the decreased stitches for the previous row). Work 6 rows total in ribbing and BO loosely in pattern.

Yay!

FREE PATTERN: Woodland Shawl

If you’re a chart person, you should totally use this fabulous chart!

Errata: If you printed this out the first day it was up (8/23/07) , there was an typo in line 14 of the lace pattern (it said P2 instead of P1), with the same error in the setup row (fixed 9/18). The setup row is the same as of 14, but when I fixed the typo in the pattern, I neglected to fix it in the setup row. I’ve also added clarification to the beginning/ending rows for the scarf variation. (Thanks for your help, everyone. It’s my first all-over lace pattern, so I’m not terribly adept at spotting typos. Maybe I should switch to charts–suddenly I understand their appeal.)

Finally, I cleaned up/clarified the ending section on 10/19.
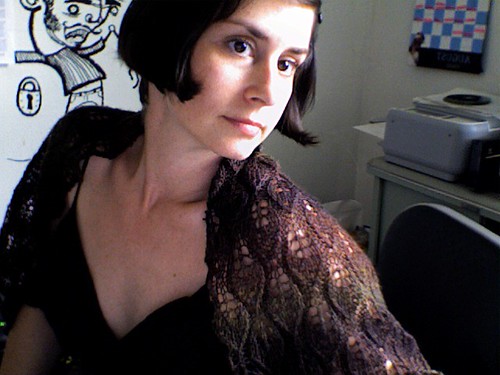
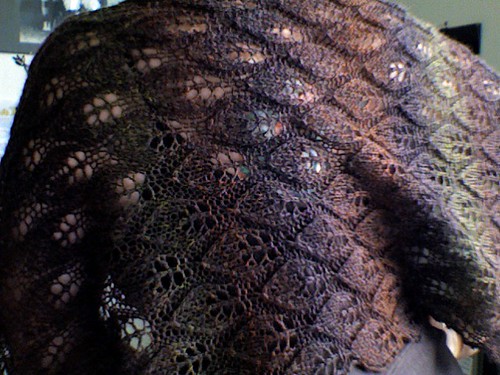
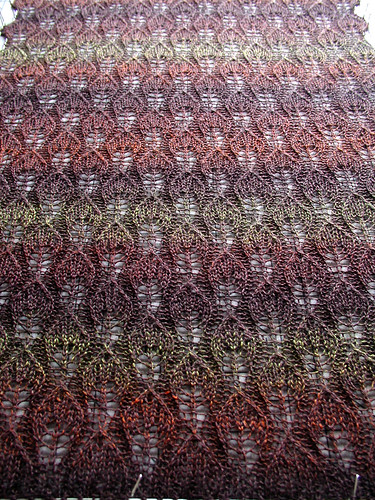
This self-striping sock yarn has a dark brown base with layers of green, yellow, and orange, for a rich, woodsy pallette perfect for a nice leaf patten from a vintage knitting pamphlet. Since I only had one ball, and since I got it at last year’s TNNA and had little hope of finding another from the same dye lot, I was delighted to be able to squeeze a whole shawl out of a single skein. While it’s not skimpy, it is on the dainty side, but if you have an extra skein, you could get a much more generous wrap. If you want it wider, cast on an extra 12 st for each extra double column of leaves (each set adds 2.5-3″/7cm in width). If you want a long scarf instead, start by CO 41 st and work the beginning/ending rows in 1×1 rib, starting with K (instead of K2 at beg & end, you’ll have K1)

Yarn: 1 skein Lana Grossa Mega Boots Stretch Soft Color, color 502 (460yd, 100 grams, 70% Pure New Wool,23% Nylon, 7% Elite Elastic Fiber)

Needles: US 6

Finished, Blocked Size: 21″/53cm x 40″/102cm

Notes: Due to differences in individual tension, it’s difficult to specify exactly how many repeats you’ll need. I use this trick to gauge how much yarn I’m using:

About 8 rows in (or at any wider section–this pattern undulates, so to be safe, measure at the wider portion), I hold my needles in my left hand and pull out enough yarn from the skein to reach my right hand with my arms outspread. Then I tie a slip knot at the end of that length. I repeat it a few more times. Then I knit a row as usual, making a note of how many slipknots I pass, and how far between the next set my knitting takes me. I usually repeat it a few times over the course of the project to make sure it’s accurate.

When I’m nearing the end of the skein, I unwind the remaining yarn and measure it with armslengths to figure out how many rows I have left in the skein, and always allowing at least one extra row’s worth as wiggle room.

ABBREVIATIONS

BO: bind off
CO: cast on
K: knit
K2tog: knit two stitches together as one
P: purl
SKP: Slip 1 knitwise, Knit 1, Pass the slipped stitch over the knit stitch
SK2P: Slip 1 knitwise, K2tog, Pass the slipped stitch over the K2tog
YO: yarn over
PATTERN

It helps me to have a sense of the pattern to get a handle on it. Here’s how this one goes. Each leaf is flares out along a central knit stitch with 3 stacked pairs of YOs flanked with a growing number or knit stitches, then tapers back to a point with a series of SKP/K2togs flanking a decreasing number of knit stitches. The point is formed with a SK2P. You’ll be working the bottom/fat/YO half of one leaf as you work the top/tapered/dec half of the adjacent, staggered leaf, so as one leaf flares to the maximum, the adjacent leaf with be tapering to its point. A gutter of 2 purls separates the staggered columns of leaves.

All the action happens on the right side. The wrong side is worked in pattern, with YOs always being purled.

I’ve noted the net change (e.g, 4 YO – 2 dec st = net +2) for each row that causes a stitch count change in the subsequent row.

Row 1 (RS): P2, YO, K1, YO, P2, *SKP, K3, K2tog, P2, YO, K1, YO, P2, repeat from * to end. (net change: +2)
Rows 2 and 12: K2, P3, K2, *P5, K2, P3, K2, repeat from * to end.
Row 3: P2, K1, YO, K1, YO, K1, P2, *SKP, K1, K2tog, P2, K1, YO, K1, YO, K1, P2, repeat from * to end. (net change: +2)
Rows 4 and 10: K2, P5, K2, *P3, K2, P5, K2, repeat from * to end.
Row 5: P2, K2, YO, K1, YO, K2, P2, *SK2P, P2, K2, YO, K1, YO, K2, P2, repeat from * to end. (net change: +2)
Row 6: K2, P7, K2, *P1, K2, P7, K2, repeat from * to end.
Row 7: P2, *K7, P5, repeat from *, end with K7, P2.
Row 8: K2, *P7, K5, repeat from *, end with P7, K2.
Row 9: P2, SKP, K3, K2tog, P2, *YO, K1, YO, P2, SKP, K3, K2tog, P2, repeat from * to end. (net change: -2)
Row 11: P2, SKP, K1, K2tog, P2, *K1, YO, K1, YO, K1, P2, SKP, K1, K2tog, P2, repeat from * to end. (net change: -2)
Row 13: P2, SK2P, P2, *K2, YO, K1, YO, K2, P2, SK2P, P2, repeat from * to end. (net change: -2)
Row 14: K2, P1, K2, *P7, K2, P1, K2, repeat from * to end.
Row 15: P5, *K7, P5, repeat from * to end.
Row 16: K5, *P7, K5, repeat from * to end.
INSTRUCTIONS

CO 89.

Edge:

K2, *P1, K1, repeat from * to 2 st from end, K2. Work following row in pattern.

Pattern set-up row (WS): K2, P1, K2, *P7, K2, P1, K2, repeat from * to end.

Begin pattern, repeating until you have 12 extra rows’ worth of yarn worth remaining. (I had enough to work 12 repeats before my ending section.)

Ending section:

Row 1 (RS): P2, M1, K1, M1, P2, *SKP, K3, K2tog, P2, M1, K1, M1, P2, repeat from * to end.
Row 2: K2, P3, K2, *P5, K2, P3, K2, repeat from * to end.
Row 3: P2, K1, M1, K1, M1, K1, P2, *SKP, K1, K2tog, P2, K1, M1, K1, M1, K1, P2, repeat from * to end.
Rows 4: K2, P5, K2, *P3, K2, P5, K2, repeat from * to end.
Row 5: P2, K2, M1, K1, M1, K2, P2, *SK2P, P2, K2, M1, K1, M1, K2, P2, repeat from * to end.
Row 6: K2, P7, K2, *P1, K2, P7, K2, repeat from * to end.
Row 7: P2, *K7, P5, repeat from *, end with K7, P2.
Row 8: K2, *P1, K1, repeat from * to 2 st from end, K2.

Work following row in pattern (knitting the knits and purling the purls), then BO.

Wet block to approx 21 x 40″.
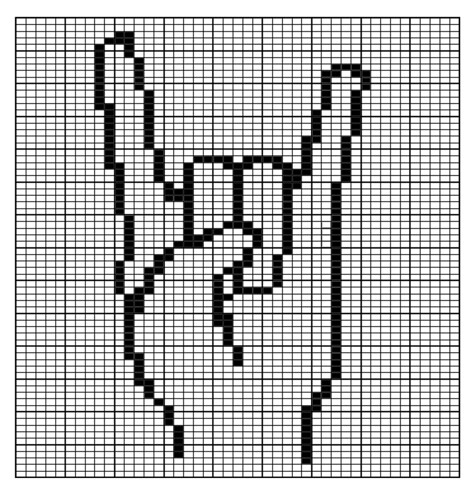
FREE CHART: RAWK!

I’m catching up on my posting. Here’s a chart I put on flickr but forgot to put here.

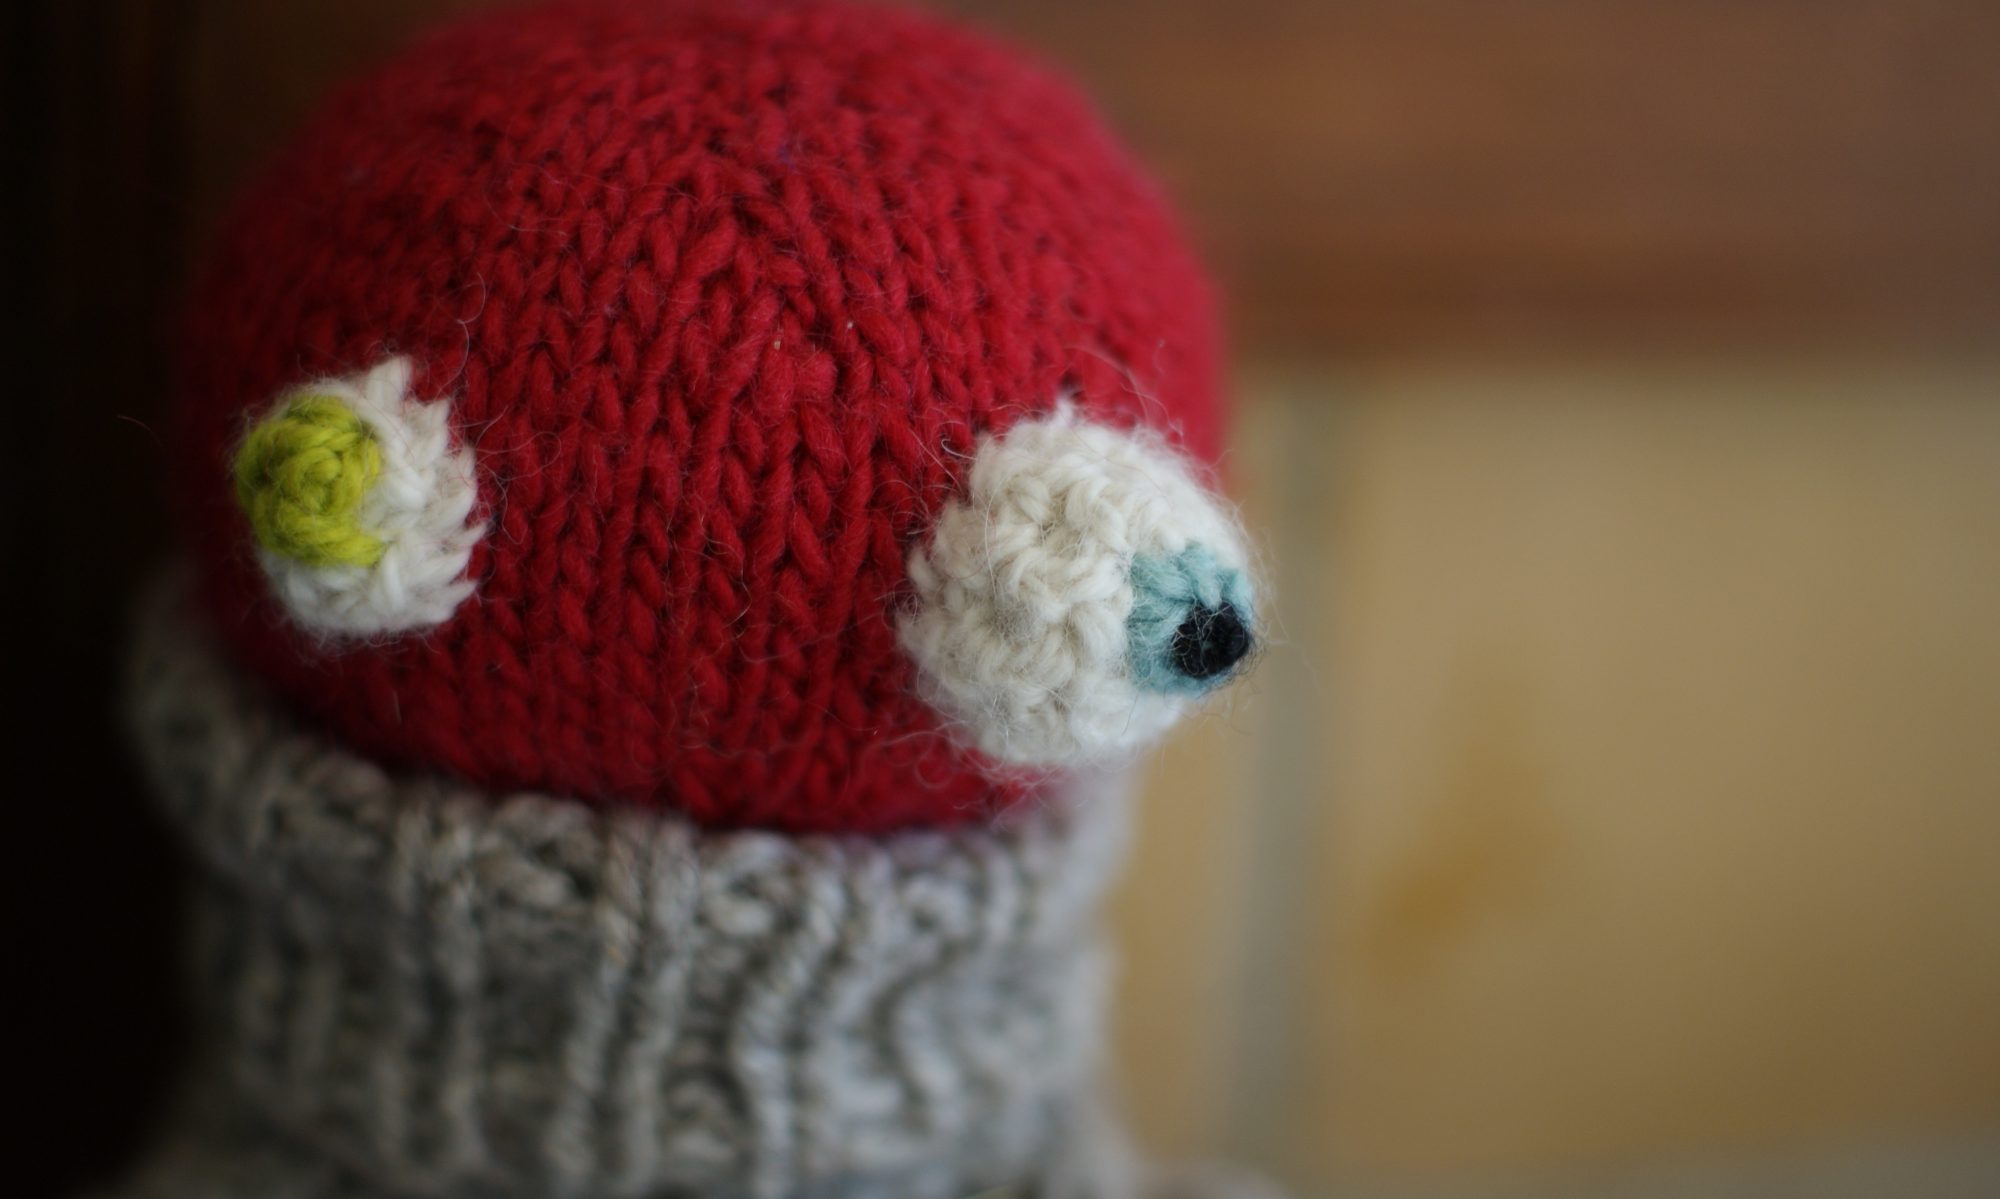
It’s a rock hand, shown here in a crappy picture.

I’ve made a small change, eliminating the indentation under the pinkie.

RAWK chart

Clicking will take you to the flickr page, which has different sizes for your printing pleasure.