Last week, bumping along a gravel road after a two-and-a-half hour drive, I thought to myself: What the fuck am I doing?
That didn’t stop me from pushing on, of course. But it was the bud of an epiphany. An epiphany that didn’t change my behavior in any way in this case—but maybe it will, going forward. This was my epiphany: this is why you’ll never be really successful.
If you’re into Skepticism or psychology or science advocacy or just, you know, fact-based anything, you’ve probably heard of doubling down. It’s the psychological phenomenon of how, when confronted with evidence that contradicts someone’s worldview or belief system, instead of reshaping their beliefs to incorporate this new information, they dig in deeper, reject the conflicting evidence, and believe/defend their flawed position all the more ardently. That’s pretty much the root of most human nonsense, from the intense tribalism in our current political system, to the recent increased outbreaks of virtually-eliminated childhood diseases, to conspiracy theories. I understand it intellectually, and I can navigate it pretty effectively in news, politics, and lifestyle—yet it’s still my core Achilles’ heel in many ways. The Ongoing Chick Situation is a manifestation of this.
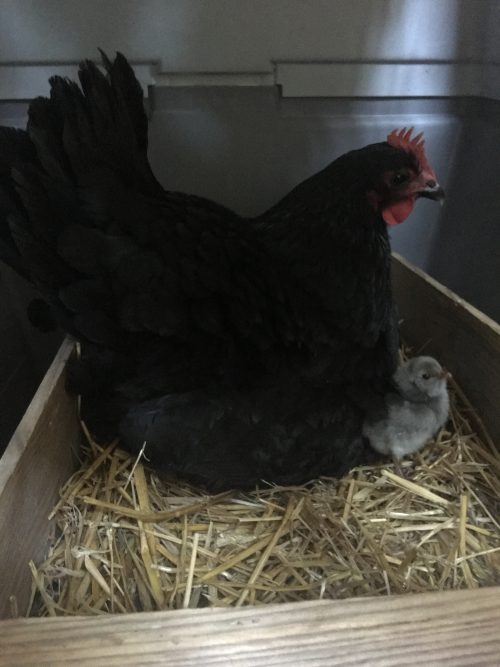
For several years, I’ve had 2 hens. They’re delightful: a friendly, charming, low-maintenance pair, providing zero drama and adequate eggs for our family. Then this rooster showed up (truly just showed up on the front porch—I did nothing to procure a rooster). After some rehabilitation (chicken jail), we decided he can stay.
Pretty soon, Ruby went broody and I thought, why not? I’ll let her set some eggs. If she hatches them out, she hatches them out, and we’ll have chicks; if not, we’re no worse than before. But I’m not going out of my way here. After all, I’d resolved to spend 2018 tying up loose ends, not unravelling new ones. Money is tight and I don’t want to spend anything on this.
So that was The Plan. (Cost: $5 for a small bag of Chick Starter; Time commitment: 0.)
A week into The Plan, I candled the eggs (with a flashlight and toilet paper roll; still on target) and started to get a little bit excited. Then I stated to spend a lot of time reading about hatching with broody hens on chicken forums, and staring at crazy rare breed chickens online, and researching chicken genetics. Then I bought a proper candler (+$19=$24). 4 days before hatch, all 6 eggs were alive and kicking. Then I thought: But what if she abandons them at the last minute? I panicked and bought an incubator, just in case (+$84 =$108).
Then the first chick hatched!
The next day: more chicks. Then snake-based disaster, and a personal meltdown, followed by maybe an hour of sleep.
So, sleep-deprived and faced with evidence that the Plan had failed (or, at least changed; after all, there was still one chick), instead of adjusting my expectations and moving on, I doubled down.
Plan B: snake-proof the coop!
Quickly followed by Plan C: snake-proof the coop and replace the chicks!
When I told Twyla about Plan C, she said, “But Mama, that’s just nature.” Yes, my 5-year-old daughter has more sense than me. For half a second, I saw the absurdity of Plan C and almost went back to Plan B. Almost. Instead, I scrapped my to-do list and called up Beautiful Day Farms (2 1/2 hours away) to see if I could come get some chicks.
First we stopped at Home Depot for 1/4-inch hardware cloth to skirt the coop, 1/2-inch hardware cloth to replace any chicken wire, and a little shovel better suited to trenching around the coop (+$145=$253). Then we set out for the farm, en route to which I had (and squelched) my WTF moment.
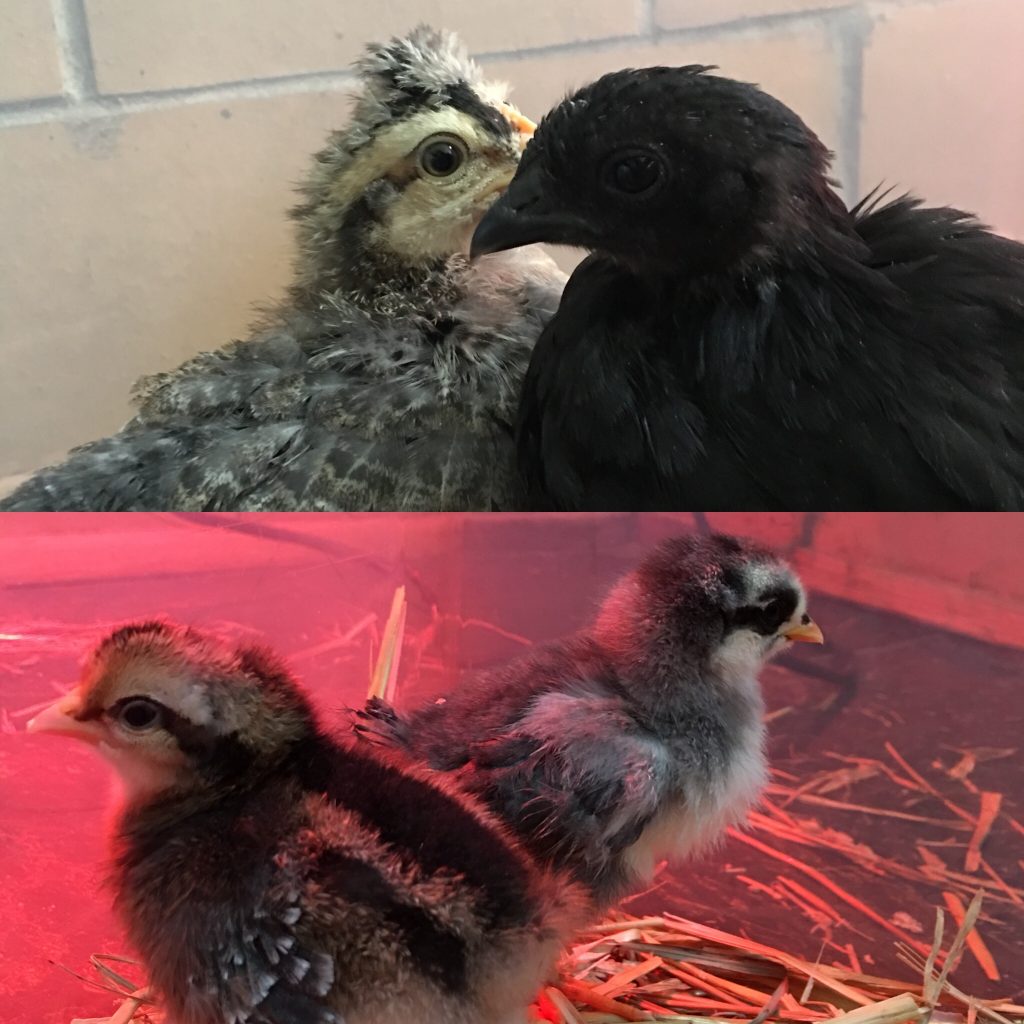
I wanted autosexing breeds so I would be sure of hens. But the hatch of the day only had one: a Crested Cream Legbar; so the rest of the chicks were just 50/50 shot at being hens. Since the hen-hatched chicks would have been 50/50, that obstacle was easy to ignore. We came home with 3 just-hatched chicks (the CCL pullet, a splash Blue Isbar—because Twyla’s one request was a yellow chick—and a Spitzhauben), plus a 4-week-old Svart Hona (Swedish Black Hen–“hen” is nominal only at this point).


Plan C: Twyla’s yellow chick, my Crested Cream Legbar, the Spitzhauben; and the inadvertent Plan D: the Swedish Black Hen (who may or may not be an actual hen).
Since the hatch of the day was pure luck and fulfilled my entire chicken wish list (never mind the rooster question, and that the Svart Hona wasn’t actually a tiny chick and didn’t fit into the Ruby adoption plan), I left feeling like Plan C was a success, not yet noticing I’d actually drifted into Plan D (snakeproof the coop, replace the chicks, and brood another chick myself).
Oh, and +$47=$300 now (The rarer breeds are more expensive, $8-$12 ea instead of the usual $3-4/ea at the feed store. But since none of the feed stores have chicks any more, and expensive small order shipping would have put cheap breeds well over that, and dragged out the timeline, I was still feeling pleased with myself.)
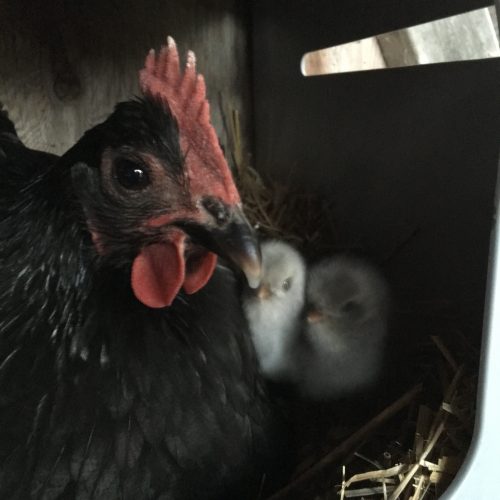
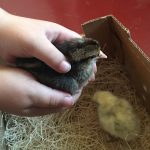
That night, I slid the three chicks under the sleeping Ruby, and everything seemed great. Next morning, two of the chicks popped up from under Ruby along with her original chick, and she started sharing a bit of bread with them. But the little CCL got up after the other chicks, had a good long drink of water behind Ruby’s back, then strolled around the other side to see what everyone was doing. Although the chick had been under her wing all night, Ruby spotted the new arrival, decided she was a threat and an interloper, and immediately and repeatedly chased her off with increasing ferocity. So I pulled her out and put her back with the Svart Hona, who I had since decided needed a roommate so she wouldn’t be all on her own when it was time to send her out into the coop (Plan E). I’d put the CCL chick under Ruby again tonight and they could start fresh in the morning.
But the goth chicken started pecking the little chick and I had to separate them.
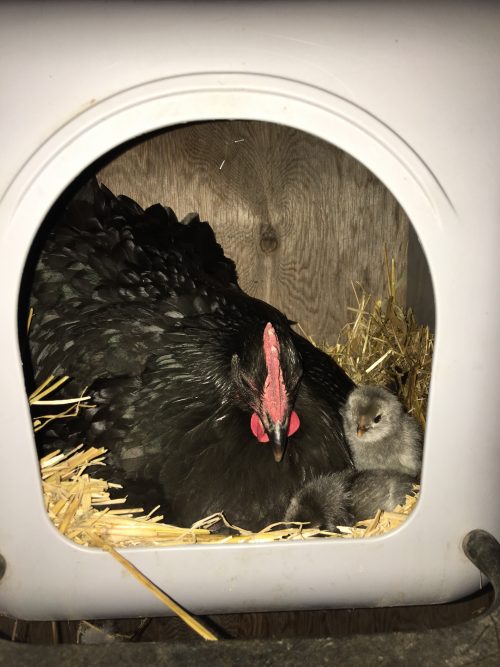
That night, the little chick went back under Ruby with no fuss. The next morning, the adoption seemed successful. I noticed the CCL seemed to be mostly staying under Ruby instead of joining the other chicks, but wasn’t too worried. I went back to working on the coop.
As I started to clear out the old hay bales (put there to add some levels for jumping around), I thought I saw something black and smooth disappear deeper into the hay. I pulled back a handful of hay and it happened again. When I abruptly yanked apart the bales, there was a writhing tangle of snake or snakes (I couldn’t tell if it was one big one or a bunch of them), right there in the coop! Aha! Busted!
I ran inside to get the a bin and something to grab the snake(s) with (I came up with kitchen tongs, comically impractical and immediately abandoned). While I was rushing around, my mom pointed out the frantic peeping coming from the kennel. I stopped to investigate and discovered Ruby pecking the crap out of the beleaguered chick again, so I snatched her away and thrust her at my mom to babysit (since I’d just stolen her brooder for the snake bin).
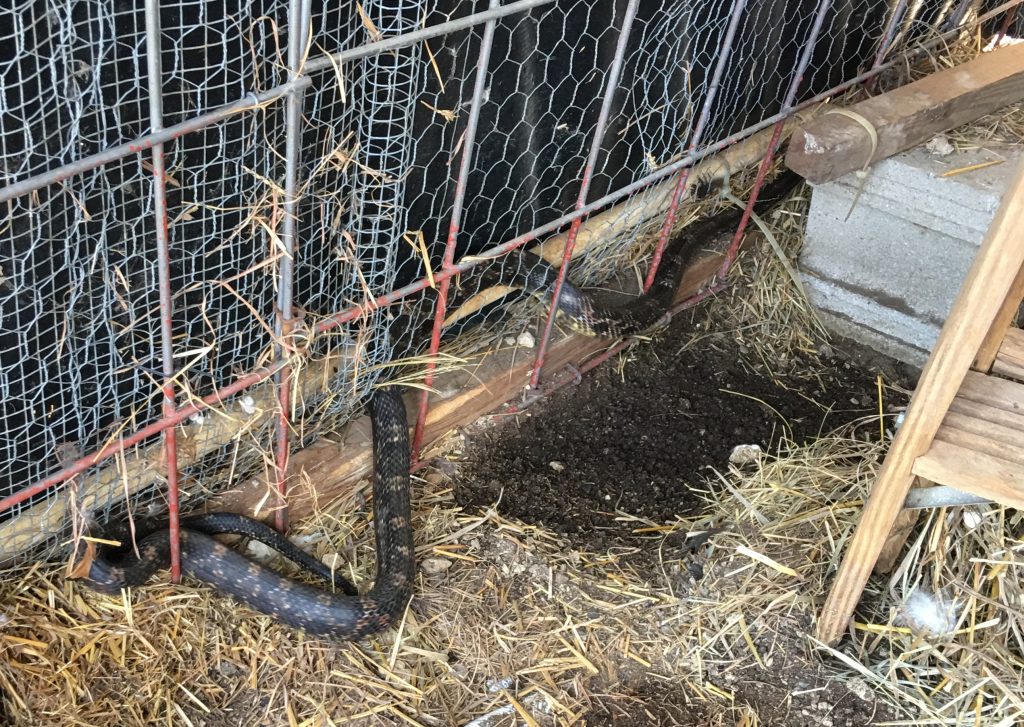
Getting a snake into a bin isn’t as easy as you might imagine (or maybe your imagination is more sensible). I tried to chase it into the bin–obviously, without luck. I quickly learned that yes, even a pretty big snake can easily clear chicken wire. Once it was outside the coop, I was desperate to catch it before it disappeared, so in the end, I just grabbed it by the tail and awkwardly forced it into the bin and closed the flaps. (By the way, since I knew it wasn’t venomous, it wasn’t at all scary, just embarrassingly clumsy. And I once anxiously called a neighbor to help with a snake in the building. That one ended up being harmless, too. But I’d had a baby sleeping on the floor in the next room and I couldn’t see the thing’s head or tail, just the patterning, which looked too rattlesnakeish for comfort, so I’d panicked.) But I’m sure there are other snakes—there may have even been others in the coop—I’d spent 10 minutes screwing around with the bin and the tongs and the chick, plenty of time for any others to be a hasty retreat.
Since none of the extension offices I called could give me an answer about how far I needed to move a rat snake, and only the nature park in Lawrence said it was okay to drop one there, I left the snake in its bin with some hay in it and a couple of bricks on top. Later, my friend Charlene graciously took them out to her homestead (no chicks, and she’s in the country too, so another mouser of any species is welcome).
Then I texted the (closer, thankfully) Cream Legbar chicken lady I’d found on craigslist to see if she also had a baby chick for our little rejected peeper (Plan F), as well as the older chick I was already getting as a roomie for the goth chicken. Both pairs seem to be getting along well, thankfully (+$20=$320).
So. Instead of an effortless mixed family of adorable chicks in the coop, I now have: 2 chickens in the coop, an unresolved snake problem (which wasn’t a problem at all with full grown chickens—it kept the mice and packrats at bay), a hen and 3 chicks in a dog kennel, 4 more chicks in 2 separate brooders, and an unknown number of potential roosters. And I’m down $320 that I really can’t spare (plus a tank of gas: $360). And my life is all chickens, all the time. All because I couldn’t just move the fuck on when something I spent all of 3 short weeks looking forward to didn’t work out exactly as planned.
And this is the reason I will never be really successful.
(ETA: To be clear, that’s not the only reason I’ll never be really successful. I’m also bad at prioritizing, terrible at time management, and I suffer from spurts of poor impulse control, among many other glaring personality flaws.)