
Thanks to Spinsters Club last Sunday, I’m finally rid of the burden of spinning the world’s most unfun fiber: the dread Gringo fur. Gringo is a lovely beast, but his fur was soul-crushing to spin. Short, matted, clumpy, jumpy, and a warm charcoal color that, while actually quite a nice color as yarn, was fucking BOR-RING to spin. I still have to knit a hat out of the stuff, which I predict will be numbing as well, but a Gatsby garden party compared to spinning the shit. So: huzzah!
And apologies to my fellow spinsters who had to suffer through two meetings of grumbling and scowling and cursing.
I still haven’t gotten around to writing up my elf bonnet pattern, and any minute now, it will be spring. Well, I keep thinking that, then the temperature crashes and we get more snow, so…. I thought I was in the final phases, until I realized too late that the gauge on my last sample was all goofy and I’d need to reknit it. I’m not in love with the color and it’s almost-but-not-quite TV knitting, so I just put it aside for something more mindless, now that Ron’s home from tour and we’re having marathon TV catchup. We do love our television.
This, on the other hand, is perfect television knitting.
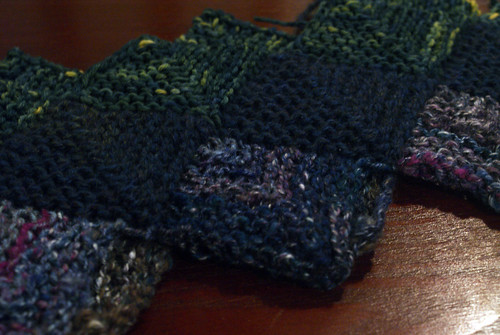
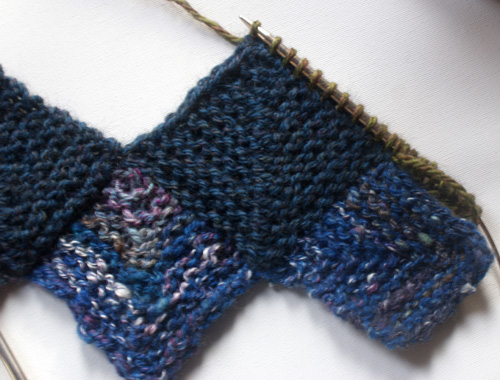
I realized I never made Twyla a baby blanket! And I needed a TV project, so this is perfect. It’s a mitered square blanket. The only thing special (special to me; I doubt it’s a unique idea, but I thought it up myself after finding lots of single-square tutorials, which to me meant too many ends) about it is that all the squares are worked in a row, so there aren’t a million individual ends to weave in.
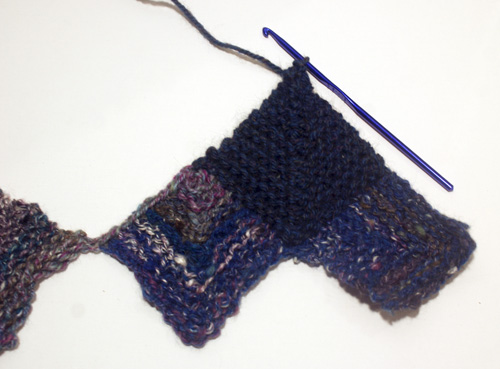
For each square, I CO 21 st and worked a central double decrease (skp) every RS/even row & knit all the WS/odd rows. You just work a square, then either PU/BO or slip stitch crochet (same results, but for most, crochet is faster) down one side to the corner, then CO again, work another square, repeat until there’s a little row like paper dolls. Just keep going until the string of squares is the width you’d like your blanket.
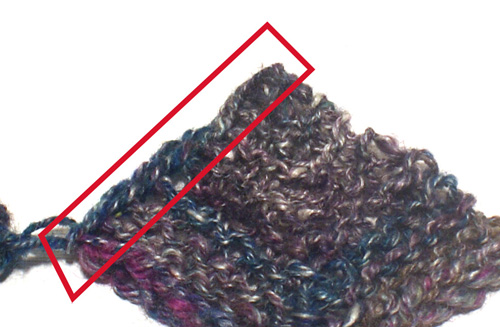
For the second row, you just start at the right again (the first square is going the wrong way because I didn’t do the slip stitch cheat, just started in on the second square), PU 21 sts across the tops of the first two adjoining squares.
After working the square…
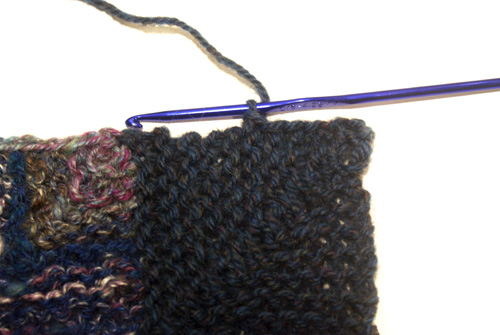
…work down to to the top of the next square below by traveling down the side with a slip stitch again.
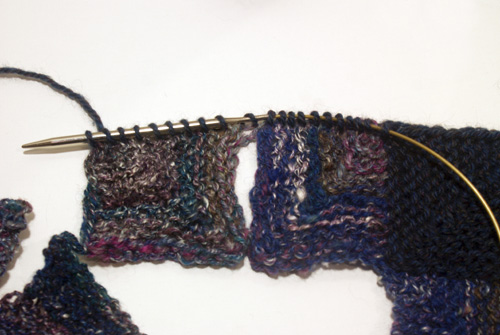
The PU another 21 sts over the next two adjoining sides, working exactly the same way as the first row, except that you PU sts instead of CO.
The second row looks like this. Note that it will have one less square than the first row. As you work across, pay attention to the top of the first squares so they’re all facing the same way, if that matters to you. They tend to spin around as they’re dangling there.
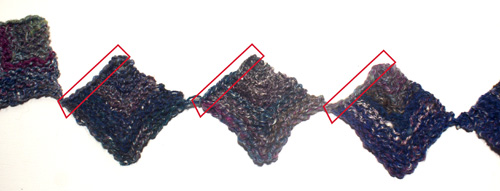
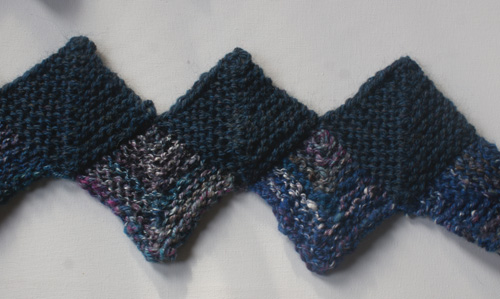
For the 3rd row (and all future odd rows), you’ll need to CO 10 or 11 (you decide what feels like the best place to place that center st), then work up the outermost edge of the first row of the second square. Otherwise, you’d make a pyramid instead of a serrated rectangle. Those floppy sts are CO, not picked up along the edge of the first row. The picture’s a little unclear.
At the end of the row, for the last square, you’ll PU 10 or 11 sts along the side of the list second row square, then CO your last 10-10 sts, so ultimately your third row will have the same number of squares as your first row.
Then just alternate between the rows until your blanket is the desired length.

It’s nice to hear from you again. I made a blanket like that once. I wonder what happened to it? I think I’ll start another one. Thanks for the idea.